In the past year I have become quite a fan of the classic Old Fashioned cocktail:
* Simple syrup
* Angostura Bitters
* Orange Bitters
* Muddled orange slice
* Cherry
* Rye or bourbon
Now, as much as I like drinking them, making one got a bit monotonous. Then it occurred to me that bartenders make them like this because they need to use the ingredients for other drinks, while I don’t.
So I decided to make an Old Fashioned mix, and based on my tastes, here is the recipe:
250 ml syrup*
30 ml Angostura Bitters
30 ml Orange Bitters
*Note, while your recipe for syrup may be classic (1 cup sugar dissolved in 1 cup boiling water), mine is 6 packs of artificial sweetener in 250 ml of water.
So then, my version, the “New” Fashioned, is 5 ml of the mix, with orange and cherry, and rye or bourbon over ice.
Interestingly, it turns out my mixing spoon holds 1 ml, so it’s very easy to make the cocktail with 5 spoons of mix.
Note, for those who use different measurements, the mix is 1 cup syrup, and 1 tablespoon each of the bitters.
As I reported some time ago, I have been trying to cut my carbohydrate and sugar intake, while still enjoying the taste. One way was to make a sugar free coffee liqueur.
In the time since, I have perfected the recipe. It is very close to how the commercial coffee liqueurs taste, and goes well in White Zylinskys and Revolver cocktails, although to be honest I prefer to make my Revolvers with rye and a bit more coffee liqueur, served over rocks.
So, the updated recipe:
200 ml dark coffee
3 packets of Splenda sweetener
10 ml vanilla extract
50 ml half and half
If the coffee isn’t hot, heat it so the Splenda dissolves easier.
Dissolve the Splenda, then add the vanilla and half and half, then stir and chill.
So, Dear Reader, I now believe I need a name for this liqueur. Thoughts? Please leave in the comments.
Like a lot of my life changes, this one has a bit of history.
For the last 20 years or so, I’ve had high blood pressure and high cholesterol. I’ve been treating both with prescription meds, and that’s kept it in check. No improvement, mind you, but it’s not gotten worse, either.
At the same time, I’d had the same doctor, who I’d picked when we moved back to Atlanta in 2001. He was the same age as me, because I’d heard to pick someone my age so they would believe me when I told them how I felt.
Then, a year ago, my health insurance had a falling out with the large hospital system my doctor was a part of, and I was forced to find another doctor. After some thought I decided to start seeing a doctor 20 years younger than me, the thought being he would be more in tune with options.
So after my first checkup in January 2022, the numbers were in line with where they had been for 10 years or so. Cholesterol was a little high, weight was high, and my A1C was high. But where my previous doctor had always seen that as the “same old same old,” my new doctor wrote me a rather stern report, and said that if it didn’t improve soon, we would need to look at more strict treatment, like insulin.
Well, dayum. So this is what the younger doctors do?
As you can imagine, this led to some serious consideration on my part. What can I do to keep from having to treat diabetes?
After a few weeks of research, and an honest discussion with my doctor, I came up with a plan: go on a low carbohydrate diet. Where most people eat 300 to 500 grams of carbs a day, I decided to limit myself to 50 per day. As you can imagine, for someone who loves pasta and breads, this was quite a change. While I plan to tell more about this in coming posts, I will tell you that it has worked so far, and I have lost 40 pounds, and all my cholesterol and A1C are in the normal range.
So, where is this post going?
Well, about the same time I started the low carb diet, I also discovered how much I like to drink mixed cocktails like Old Fashioneds. But, as I went along I realized real simple syrup was just carbs dissolved in water. And other mixers like Kahlua were just as bad.
So, having said that, this leads to the point: Low Carb Mixers. And the first is a low carb coffee mixer to replace Kahlua.
Here’s mine:
1 cup black coffee
6 packets of sucralose or other artificial sweetener
1/4 to 1/2 tsp vanilla extract to taste
Stir and refrigerate
I use this as my normal coffee liqueur in mixes, although to be honest I find it leaves my White Russians a little short on the sweet side, so I add a shot of syrup made with artificial sweetener.
Look for more low carb options I have discovered in the past year!
As many people who follow me on social media know, I am quite into bourbons and cocktails. So, in the coming weeks, I am going to be sharing some of my observations on this topic.
First, in reference to title, in the early days of the China Virus, a friend of mine noted that since the loss of smell and taste were some of the first symptoms of infection, he planned to make a cocktail at least daily, as a test.
I do that too, and I have learned a lot about mixology in the meantime.
So look for cocktail tips and observations to come.
As everyone is aware, the price of meat has skyrocketed during the pandemic, thanks to a hundred reasons. This has made making my favorite brisket almost out of reach.
Until I read an idea on the Book of Faces, that has changed my world. Well, my brisket world, any way.
Introducing the Chuckie: smoking a chuck roast like a brisket, for a quarter the price and a quarter the time.
My local grocery stores sell briskets for $3.99 a pound on a normal day, making them $80 at the cheapest. And I have to admit, while I love brisket, I’m not sure I love it that much.
But then I read on the Book of Faces how some old skool smokers would use chuck roast. And behold, I was at the store the next day, when what should appear:
Well, okay then.
So I got Johnny Tyler going – my old vertical smoker – and got some oak and hickory ready. Then I rubbed the roast all over and let it sit for a half hour while the fire got set.
Once it was ready, I put it on (with a couple of chicken breasts that I could have for lunch), and off we went.
I decided to cook just like a brisket, so at 165 degrees I wrapped it in butcher paper, and cooked to 205 degrees.
Now, I knew this wouldn’t take near the 12 hours that brisket takes, and I assumed it would be more like 6 hours, like a Boston butt. But this one was done in a little over 4 hours.
I let it rest, then sliced and served.
And I must say, the results were awesome!
While I will admit the texture was a little rougher than brisket, most likely due to where this meat comes from – up on the shoulder versus down closer to the legs. But, that didn’t change the taste. I served without sauce, and it was wonderful.
So, guess where I went the next day? Yes, back to the store for a couple more. Fourth of July will be wonderful!
One thing I am coming to terms with as I grow older is that there are always things I am going to learn. And this, Gentle Reader is one.
Prior to about a year ago, I did not know that pastrami is merely smoked corned beef.
I have eaten some great pastrami in my life, most notably at Snack N’ Shop deli in northwest Atlanta (sadly, closed since 1996). I have also made what I thought was some good corned beef, which I plan to write about soon. But to discover that the two are related was a profound moment.
Basically, both are beef brisket, brined in a salt and spice solution. Then, if you boil it, it’s corned beef, or if you smoke it, it’s pastrami.
So, let’s start with the brine.
Mix together:
1 cup granulated sugar
1/2 cup brown sugar
1 cup kosher salt
1/4 cup pink curing salt
1/4 cup honey
2 tablespoons pickling spice
1 tablespoons whole mustard seed
1 tablespoons coriander
Dissolve in 1 gallon of water and bring to a boil.
Then add the brisket, and ice to cool it. Be sure to trim all the outside fat off the brisket.
Now, find a spot in your refrigerator, and let it brine for 5 days.
Yes. Five days.
Next, we make a rub:
2 tablespoons whole black peppercorns
2 tablespoons fresh coarsely ground black pepper
1 tablespoon whole coriander seeds
1 tablespoon coriander powder
1 tablespoon brown sugar
1 tablespoon paprika
2 teaspoons garlic powder
2 teaspoons onion powder
1/2 teaspoon whole mustard seeds
1/2 teaspoon mustard powder
Apply liberally to the wet brisket. Note, I bought a point.
Light the smoker, and get it up to 225F, and get the beef on.
Smoke until the internal temp reaches 205F. I used oak and hickory.
When it’s done, let it rest for a half hour minimum.
Note how the curing salt adds the pink color even when done. Cooking to 205 breaks down all the internal
I am a big fan of the Rueben sandwich, so I made some.
A Reuben is basically a grilled sandwich of pastrami, sauerkraut, and Swiss cheese, on rye bread.
Most Reuben recipes call for using Russian dressing, and some use thousand island dressing. Growing up, we watched Julia Child make Reubens, and she used a homemade mayonnaise and horseradish mix that I love.
Now I must say, the pastrami was wonderful, even left over by itself.
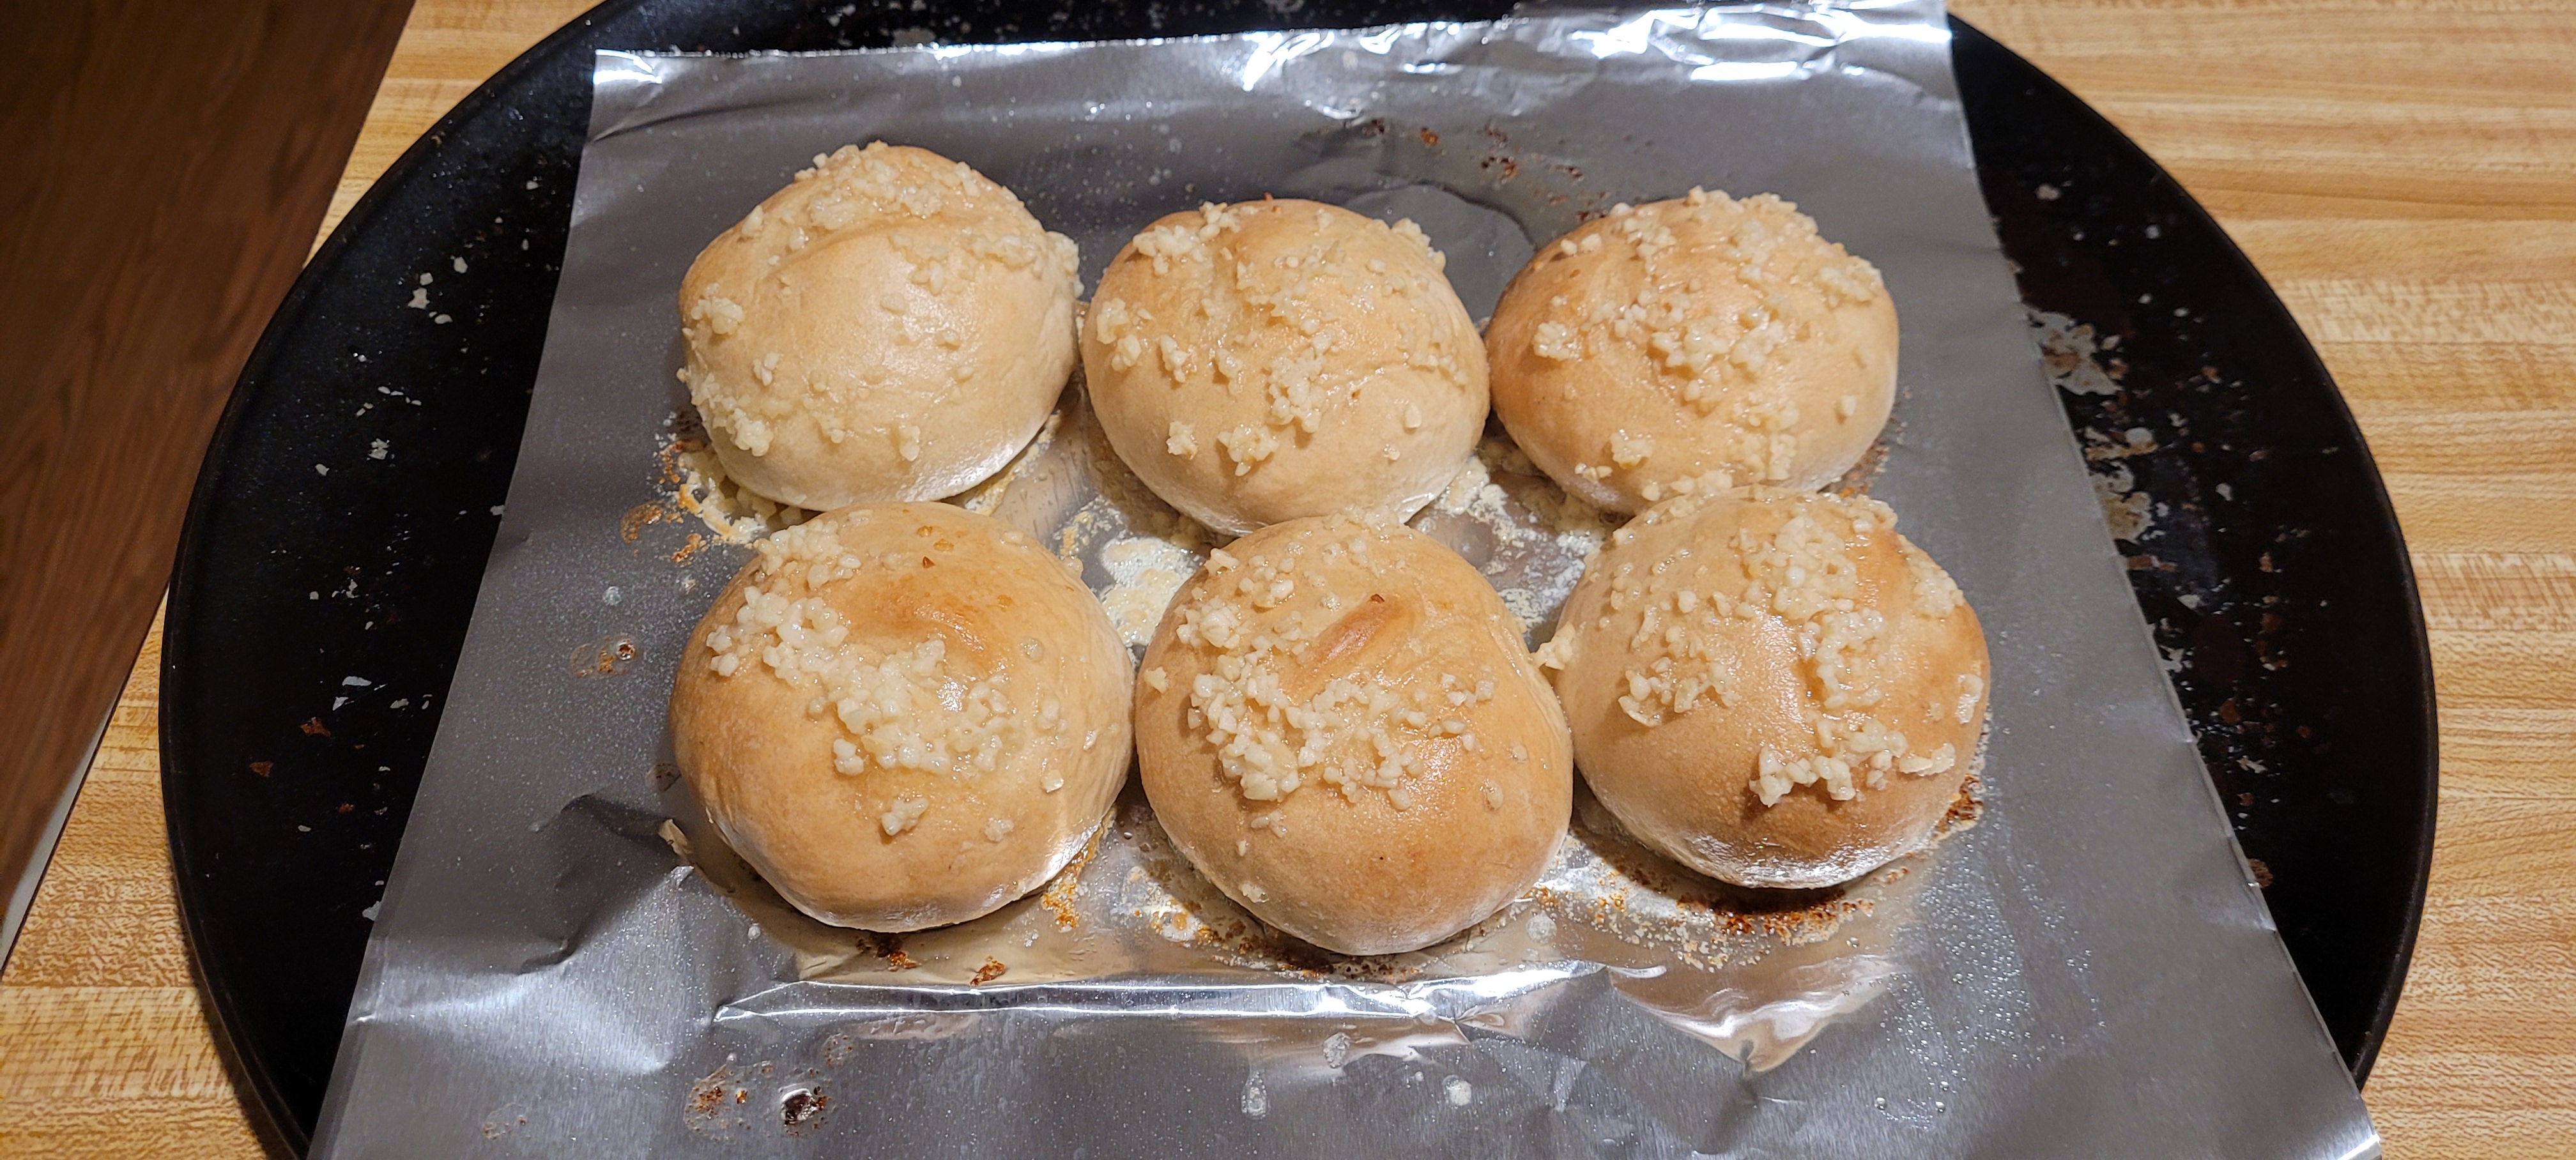
Our family enjoys pasta, probably twice a week. Given that, for a long time we just ate rolls or bread with it. So, I decided to work on something tasty, and easy to fix. Here is my answer.
Prep time: 20 minutes Cook time: 15 minutes
6 Rolls
6 tablespoons butter, melted in a ramekin
Preheat the oven. You can choose your temperature, I use the default 350F, unless I am cooking something else.
First, cover a sheet pan with aluminum foil and lightly coat with cooking spray or oil. Then put your rolls on.
Once the oven starts heating, and gets about about 250F, put the rolls in for 5 minutes, uncovered.
While they heat, melt about a tablespoon of butter per roll in a ramekin, by heating about 30 seconds in the microwave.
After five minutes, remove the rolls and let rest a minute. Then coat with melted butter Place back in the over for 5 more minutes.
While they are in the oven the second time, add about a half tablespoon of garlic per roll to the remaining melted butter, and mix well.
After 5 minutes take the rolls out, and brush them again with the remaining butter and garlic.
Please know, Gentle Reader – and I hope this does not come as a shock – that my love for barbecue is at most one notch above my love for chili con carne. To get there, I will tell you a story.
One of my father’s best friends moved to Texas when I was young, and sent my parents a recipe called Chili por el Animo, or Chili for the Soul. My mother started making it, and even added some notes at the bottom, like making sure to use a wooden spoon.
Here is the original recipe, now framed in my kitchen:
Over the years, I have made dozens of batches of this wonderful chili. I have stories and fables to tell, which I will share elsewhere. But suffice to say that I have added a few things and refined some, so that I now present to you Chili del Cielo.
Here is the full recipe:
So, let’s get started.
I find that fresh vegetables make the best chili. So I start with the peppers and onion.
Of course, we can vary the heat of the chili by the amount of peppers we use. I find that a medium amount, as shown here, makes what I consider a pretty mild chili.
Chop the onions and peppers medium.
After chopping the peppers, put one finely chopped jalapeno aside.
Here’s the meat, beans, and tomatoes.
Brown the meat and sauté the onions, peppers, and garlic.
Drain the fat from the meat if you wish, but don’t rinse. You want a little of that fat remaining on the meat, as it will absorb some of the flavors from the peppers better.
Add the tomatoes and beans (with liquid) to the meat. Note, for variety, you can try different kinds of beans.
Then add the sautéed vegetables.
Here are the spices.
I find the lid from a jar of parmesan cheese holds exactly 1/4 cup – so it makes a great measuring cup for the chili powder.
I also wait until after I add the beer, to add the cinnamon and paprika.
Next, add the beer.
Note, I am adding a whole beer. To be honest, it was shared with me by my Dad’s friend, that he originally figured he was drinking beer all day while making the chili, and when he thought about it, he would add some beer. He figured that over the space of making the batch, he added about a whole beer, out of the six pack he drank. The choice is yours.
At this point, add the remaining fresh jalapeno. I find that the fresh pepper adds to what is provided by the sautéed peppers.
Now, bring to a low boil, and then move it to a small burner, and simmer, covered, for 2-1/2 hours or so.
Stir about every 20 minutes or so, and taste it after an hour or so, and add salt and/or cayenne pepper as you see fit.
Then, move the lid so there is a gap, and turn up the heat slightly, and “cook down” for an hour or so, cooking off some of the water, and thickening the chili.
At this point, it’s ready to go. I serve mine with some chopped fresh onion and grated cheese.
Refrigerate any leftovers, but know that the peppers will continue to do their magic, and the leftover chili will be noticeably spicier than the fresh chili.
A couple of weeks ago I wrote about my first real attempt at dry ribs. Over the course of the next week, I ate the leftover ribs, intentionally eating both dry ribs and wet ribs in the same meal, and made it a point to compare them. Here is my take:
The dry ribs were smokier tasting.
This is because the dry ribs are exposed to the smoke for the whole cook, while the wet ribs are essentially only exposed directly for about an hour, until I start to mop them with sauce. In addition, the wet ribs are wrapped for the last 2 hours of the cook, while the dry ribs are not.
The better smoke exposure is obvious when we look at the great smoke ring, in the photo above.
The dry ribs were spicier tasting.
This is directly because the rubs are different. The dry rub contained cayenne pepper, brown sugar, and chili powder, while the wet ribs had my traditional Franklin-esque salt and pepper only rub.
The dry ribs were more tender.
This one, I am not totally sure why, because the two kinds of ribs make a difference – full rack for the wet ribs, and baby back ribs for the dry ribs. Next time I should do the same style of meat and compare.
In conclusion, while this was the first time I had done dry ribs, it won’t be the last.
Am I giving up on wet ribs? No. But I’m not ruling our dry ribs any more!
I have been blessed to eat ribs at some of the most famous joints in America. From Raleigh to Atlanta to Memphis to Amarillo to Kansas City, I’ve eaten a lot. I must say, I am quite a fan of Memphis style ribs, and specifically, wet ribs. I spent some time a few years ago often visiting Memphis on business, and I ate at Corky’s, Rendezvous, and Interstates quite frequently. And the whole time, I only ordered wet ribs.
Now, I have had dry ribs, and probably the best I’ve had were from Dreamland, from the the original joint in Tuscaloosa. I admit, I didn’t order them dry, our plant manager did, and I wasn’t going to argue with him. They were great, but I put sauce on them, which probably told me something.
When I make my own, I have always done ribs by smoking for 3 hours, mopping as I go, and then wrapping and cooking til done. But this week the Dauphin told me he would like to try dry ribs, so I decided to give it a shot.
Spoiler alert – they turned out pretty good.
Here’s how I did it.
PREP
Starting with a rack of baby backs, I made a rub out of kosher salt and black pepper, with brown sugar and chili powder added. I also added dashes of cayenne pepper, cinnamon, and paprika. This was added liberally as soon as I started the fire, and let sit while the fire grew, about 30 minutes.
That’s a full rack on top, destined for the wet treatment, and the dry rack of baby backs on the bottom. I rubbed the dry ribs more, since that was the only source of flavor.
COOK
For this cook I used oak to start, and mostly hickory thereafter. I cooked them at about 250F for about 5 hours total, until the bones felt a little loose, and I spritzed them liberally with water and apple juice, about every 20 minutes or so. (I also did sausage, as well as the flaps from the full rack, there on the left.)
This was about 3 hours in, just after I wrapped the wet ribs.
SERVE
I let them rest about 30 minutes, then cut, and served. That’s the wet ribs on the left, and I ate equal amounts of each.
The Verdict:
The Dauphin gave his blessing, and I agree. In fact, the next time I make just one rack, I may cut it in half and do wet and dry.
Having said that, I honestly found them a little salty, so I will likely cut back on the salt next time.
I pay for all the food I eat at all the restaurants I review, and if I get anything for free, I will say so. Even then, free food doesn't influence what I write.
All opinions are mine, or those of the persons they are attributed to.